Plugin for Adobe Premiere Pro
Master
Your
Styles.
Text Style Panel makes text-style management in Premiere Pro faster and more intuitive. Every style operation, in one place.
https://moketa.booth.pm/items/8696697 ↗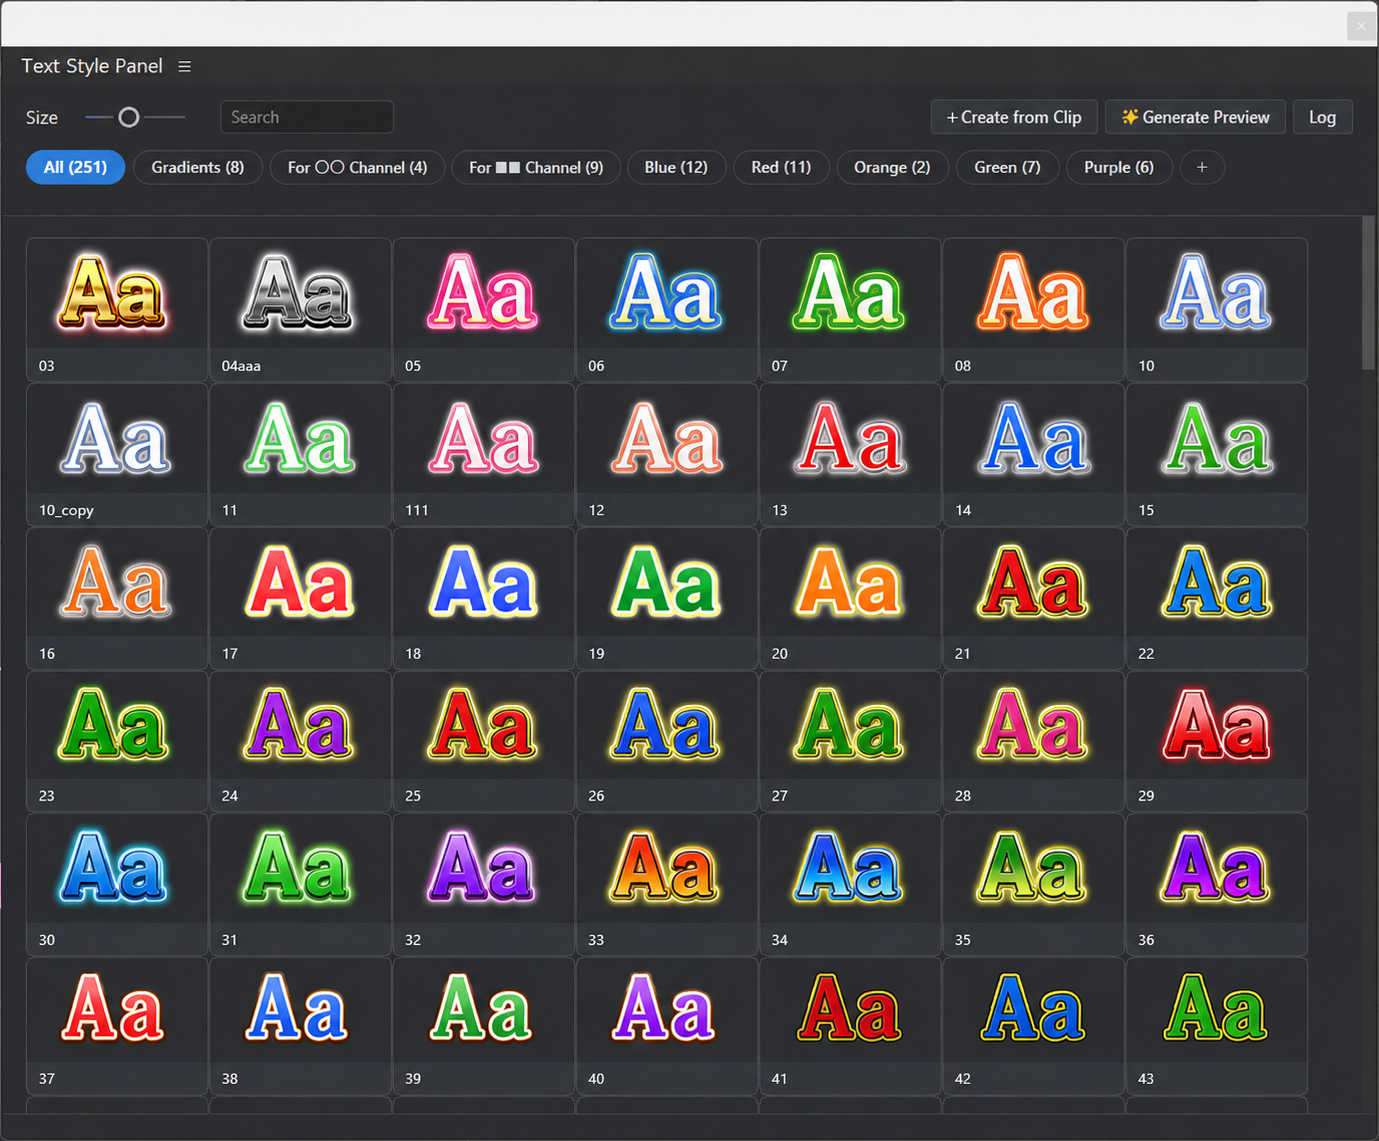
Premiere's My Styles are synced automatically — always up to date.
Organize styles freely, exactly the way you like.
Group styles by show, channel, or use case — instant access.
Pick a card and drag it onto a text clip. Apply what you see.
Capture the current look of a clip on the spot — no workflow breaks.
Workflow Benefits
Smarter subtitle & title work.
Compatibility
Basic workflow
Register styles
- Save a style with "+" in Premiere's Essential Graphics — it appears in the panel automatically within seconds
- Or select a text clip on the timeline and press +Create from Clip to capture its exact look
Apply
- Click a card — the style lands in the 0_Apply Tray bin in the Project panel
- Drag it from the tray onto a text clip
- To style only part of the text, right-click a card → Apply to Selected Characters
Organize
- Create tabs with "+" above the grid. Right-click cards to rename, duplicate, delete, or reorder
- Ctrl/Shift+click for multi-select and bulk actions
Edit
- Right-click a card → Edit Style. Adjust fill, strokes, and shadows, press ▶ Render to Preview to check the real render, then save (overwrite or as a copy)
FAQ
Q. Applying a style also changes font size and font
That is how Premiere's style feature works — size, alignment, and font are part of a style. Use "Apply to Selected Characters" if you want to keep the current size and tracking.
Q. Cards have no preview image
Press ✨Generate Previews (top right). Previews are rendered by Premiere automatically (Premiere may slow down briefly while generating).
Q. My styles don't show up
The panel reads Premiere's "Text Styles" folder automatically. If you have moved that folder, use the "Choose Folder" prompt in the panel to point to it.
Support
For bug reports and questions, contact app.contact.team0303@gmail.com. Including the panel log (Log → Copy) helps a lot.